I received this complimentary product from the Homeschool Review Crew.
Being part of the Homeschool Review Crew, my daughter and I have had the opportunity to use The Voice Library – Audio Book Creator from The Voice Library.
I was intrigued when I first heard about The Voice Library and the ideas that their website suggested.
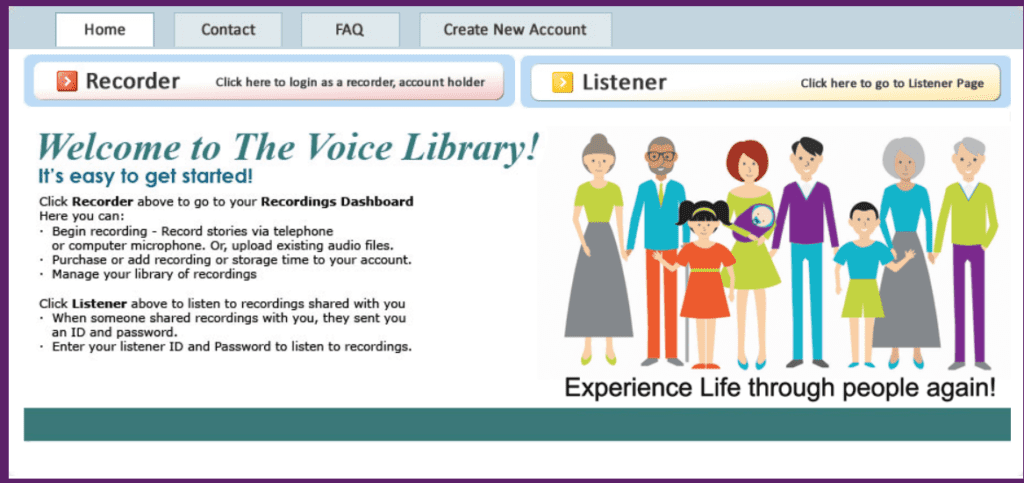
Projects such as:
- Creating a recipe book
- Recording an audio book
- Podcasting
- Interviews
- Sharing memories
Basically, you pay a fee to have access to storage space for mp3 (audio) files. These files can then be listened to by anyone who has access to a telephone or internet connection and who has the Listener ID and Listener Password that you give them.
If your storage space runs out, you can always purchase more. They call this storage space, “cards”.
So, you purchase more cards if you need them.
When you create your account and log in you see your name and account information. In order to start recording a project the directions ask you to select a card.
As you can see in this picture, there aren’t any cards. I picture cards as square shapes with perhaps a title on it.
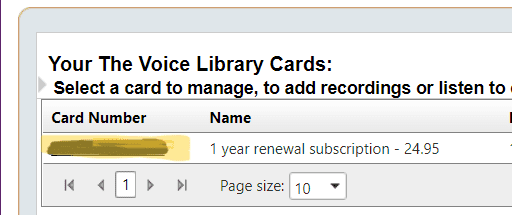
What they actually want you to do is to click on your card number, which could also be called an order number.
Once you get into your card, you can choose to record audio or upload an mp3.
To record your voice, you simply click on record audio. You see a basic screen of audio waves moving on your screen, from noise around you. My computer mic was picking up a little bit of room noise and so that is why the audio waves were moving on my screen.
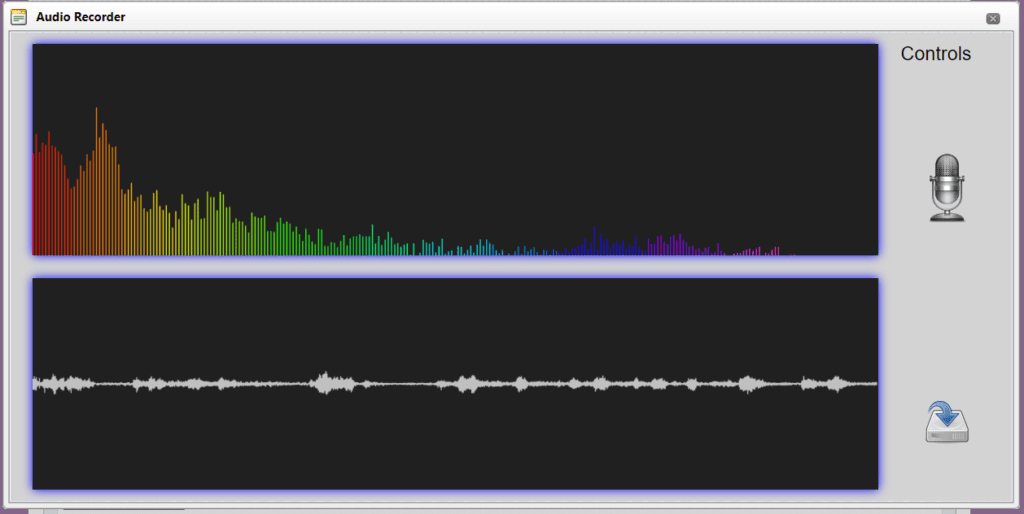
The control panel was easily labeled, but there were no start/stop buttons. I clicked on the picture of the mic and it highlighted red.
There was no timer evident to keep track of how long you were recording. I think that would be a good addition to this screen, along with a start recording and stop recording button.
Another item that would be nice here, would be a short countdown so you know when you can start speaking.
After you’re done recording, you click the mic icon again and the red highlight goes away. A new icon becomes visible to press. The icon is a little white rectangular box with a blue arrow pointing down to it. There is no label for this button either.
I pressed it and a new window opened to allow me to name my recording. I hit ok, and after about 3 minutes the file showed up on my account with my correct title.
Recording with my computer was very easy to do. Once you learn what the little icons mean you can be more confident before you begin your project.
What to do with The Voice Library Recordings
You have three options with your recordings
1. Delete it
2. Let others listen to it
3. Edit it
To edit your recordings, you have to download your mp3 audio file to your personal computer and then use your own editing software to remove, rearrange, or edit sections of your file.
Once your file is edited you can upload it back to your account. Remember when you first clicked on your card or as I like to call it, your order number? You had two options: Record or Upload an mp3 file.
Here is where you would choose to upload your edited mp3 file from your personal computer to The Voice Library. It’s very simple to browse on your pc to find your file and select it to upload. But there is a payment required to upload it.
The fee is not much. If it’s under 60 minutes, you only have to pay a dollar. The price goes up if it’s longer.
Mr. Brandano, founder of The Voice Library, did reach out and clarify that when you use the free mobile app to upload files, there is no fee. They are currently working on making changes to the pc version.
Recording Files to The Voice Library with a Telephone
You don’t have to use your personal computer to record your file. You can use The Voice Library app or use your home or cell phone too.
The phone number is available after you sign into your account. The Recording ID and Recording Password are given to you via email with your original payment to The Voice Library.
When you call the number to record a file to your account, you enter the Recording ID and Password with the keypad. The nice, automated voice gives you more options after that. You can:
- Press 4 to record
- Press 2 to change your greeting
- Press 3 to change your PIN
- Press 1 to check your account status
- Press 5 to listen to your file
- Press 6 to delete a recording
- Press 7 for customer service
- Press 8 to purchase more cards
I have no idea why the choices are out of number order. I think it would be easier for a caller to keep track of which number to press as he/she is listening to the choices if they were placed in some sort of order.
Perhaps The Voice Library would find it easier for the caller, if the number 1 was to record, 2 was to listen to the recording, and the number 3 was to delete it.
The choices could be grouped according to the reason why the caller is actually calling that particular phone number.
Make Videos with Your Recordings
I am a big fan of pictures, and I love the fact that you can add pictures to your recordings on The Voice Library’s phone app. It’s really easy to do, and you can adjust how long you want the picture to show during your recording, and where exactly you want the picture to begin showing.
This is a really nice feature, and I commend The Voice Library for adding it in. They are working to make the same functions that are on the mobile app be available on their website for computer users.
Listening to The Voice Library Audio Files
Listening to your audio files is easy too. If the account owner shares the Listener ID and the Listener Password, the listener can either access the files with any device connected to the internet, or by calling a special phone number.
I really like that listeners have the ability to listen to the recordings using their telephone. Some older people may not have internet access and the telephone is the best way for them to access the recordings easily.
The nice, automated voice reads the file numbers and the file titles to the listener so that they can access the correct file. Once the file is chosen it plays automatically.
I think it would be a good idea for The Voice Library to give the account owner options to separate audio files into groupings or even be able to make some files private and inaccessible to others.
How We Used The Voice Library
Since Abby is researching unsung heroes for her history class this year, she decided to record her heroes’ stories with our subscription.
Our family lives close by so we are not sharing the recordings with loved ones far away. I can see how this would be a great comfort and asset to military families or for missionary families though.
The Voice Library Support
The Voice Library wants your experience with them to be fun and beneficial. They are constantly working on their site, ideas, and customer suggestions. I have no doubt that the recommendations I have made in this post will be taken into consideration.
The support team is easily accessible, and they are willing to help you. During this review time, the founder of The Voice Library, Al Brandano, reached out to us to make sure we weren’t having any trouble using The Voice Library.
My Recommendations About The Voice Library
The Voice Library– Audio Book Creator is an excellent idea.
It is a good tool to use for families that are separated by distance and for preserving memories and the voices of those we love.
Follow The Voice Library on Social Media
Facebook: https://www.facebook.com/TheVoiceLibrary
Twitter: https://twitter.com/voicelibrary
Instagram: https://www.instagram.com/thevoicelibrary/
Pinterest: https://www.pinterest.com/thevoicelibrary/
YouTube: https://youtu.be/ovVepv493OI
Vimeo: https://vimeo.com/manage/videos/703528895
Read More Reviews from the Homeschool Review Crew




Thank you so much for your precious time as well as in-depth and thoughtful review.
Correction for your consideration;
When using the Free Mobile APP
Select the microphone in the top right of the presentation screen.
You will get a New Recording or Upload Feature.
Uploading from the mobile App is always Free.
Reason: Because so many people use the mobile App over laptop version we added this feature here first.
We are working on making the laptop interface the same as the mobile app – in next development cycle.
It is best to use the Mobile App for the best total experience till development is completed.
2 min video on best mobile app practices can be found ( at the bottom of this link)
https://www.thevoicelibrary.net/support/
With Gratitude
Al Brandano and team
The Voice Library
Thank you, Mr. Brandano for this explanation, and for letting us use The Voice Library.